Setting up Raspberry Pi OS
If this is your first time setting up Raspberry pi, please go through their official documentation to get started
Installing OS
Raspberry Pi OS (previously called Raspbian) is the official supported operating system. Raspberry Pi Imager is the quick and easy way to install Raspberry Pi OS to a microSD card.
Things you need:
- Raspberry Pi Imager software.
- MicroSD card (minimum 32GB) for OS.
- an SD card reader.
Steps to follow:
-
Download and install Raspberry Pi Imager to your computer or laptop.
-
Put the SD card you'll use with your Raspberry Pi into the card reader.
-
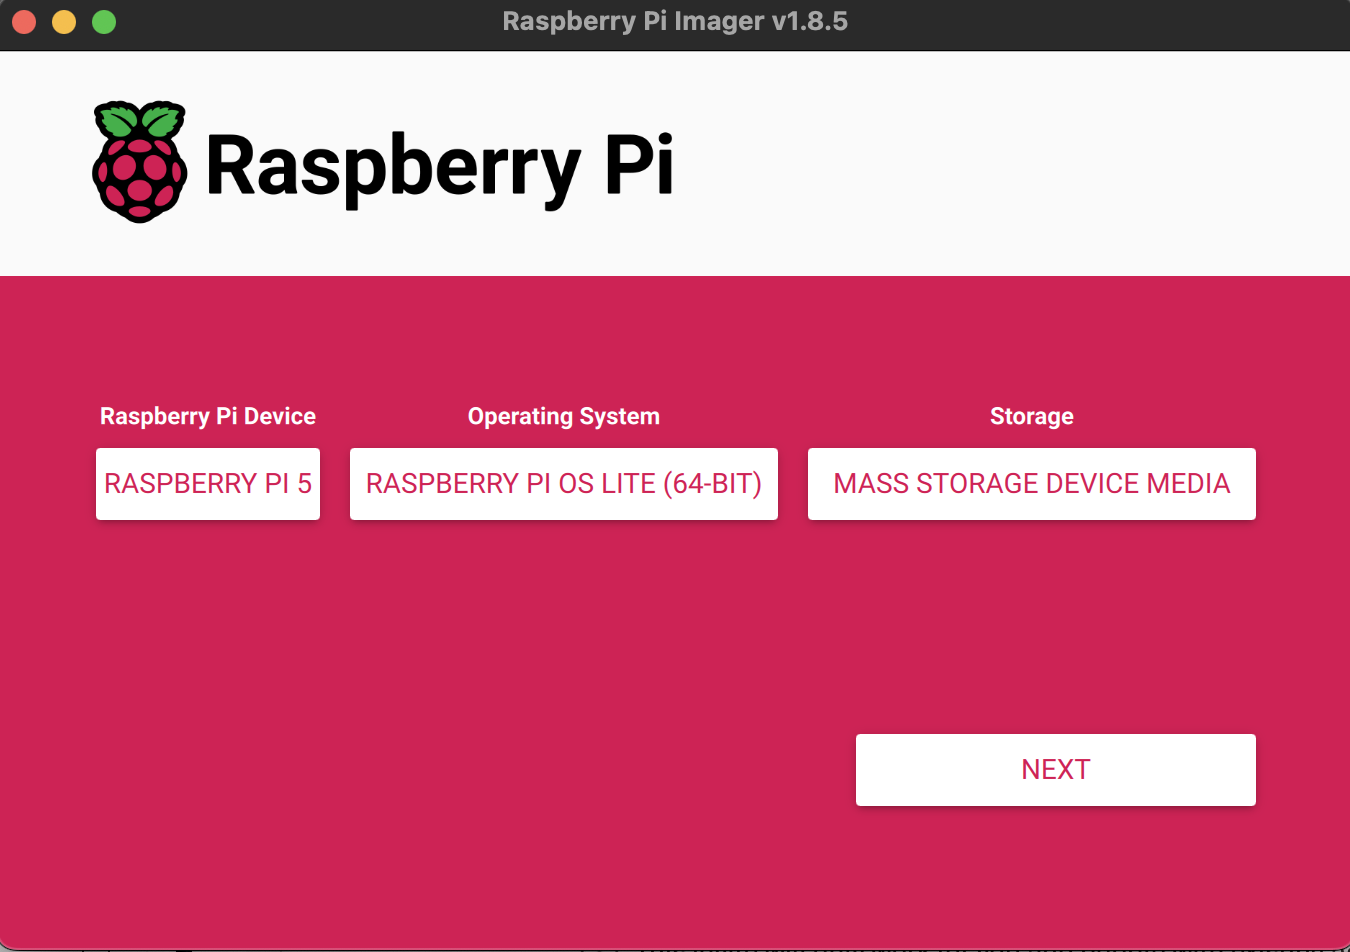
Start Raspberry Pi Imager application.
-
Select Raspberry Pi Device --> RASPBERRY PI 5
-
Select Operationg System --> Raspberry Pi Other OS >> Raspberry Pi OS Lite (64bit)
-
Choose Storage --> Select your SD Card
-
Edit OS Customisation settings
Set hostname
Set username and password
Configure wirelass LAN for wifi
Enable ssh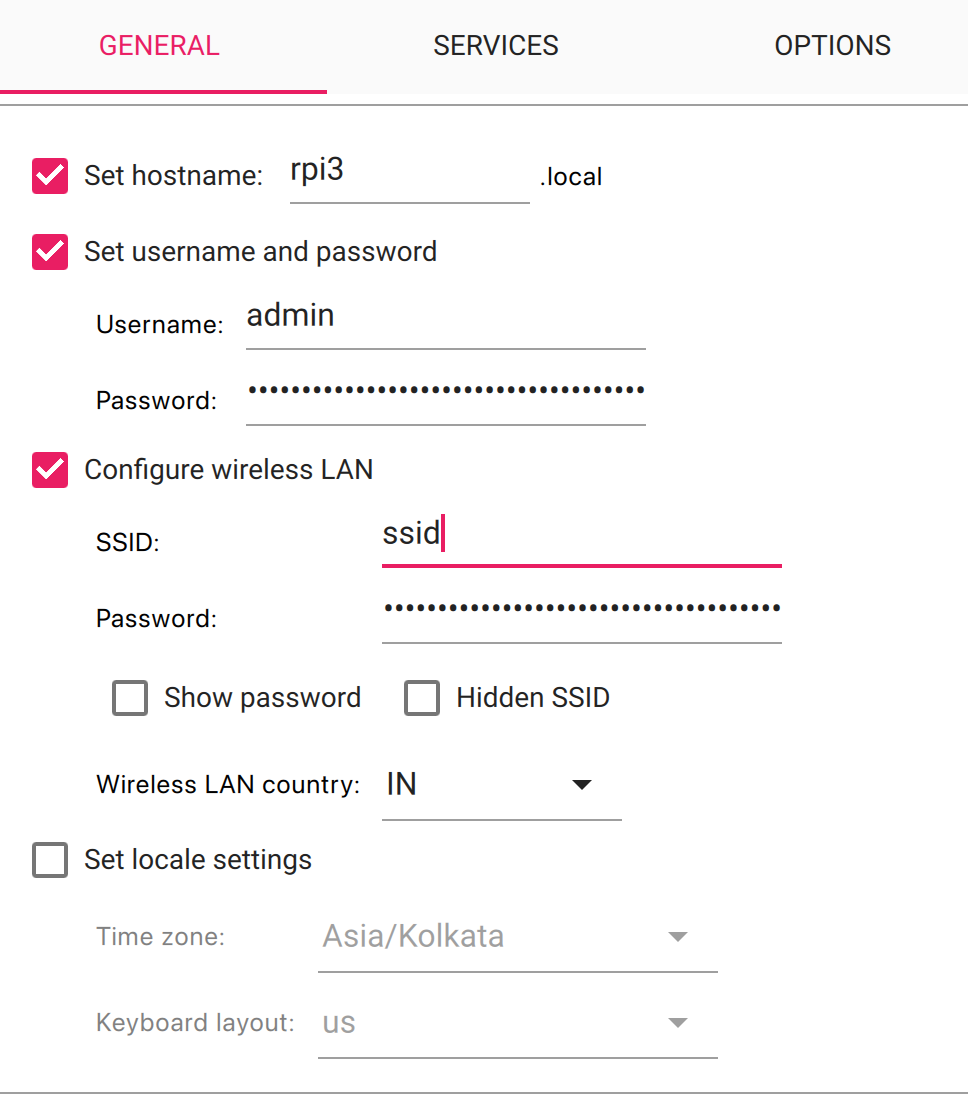
-
-
Insert the SD card into the Raspberry Pi 5 board after the installation is complete, then power on the Raspberry Pi device.
-
Access the Raspberry pi device (read more about remote access here) either by
- connecting Raspberry pi device to a monitor using HDMI.
- or run the machine headless. Use SSH for remote access. You can SSH to the hostname that you provided during installation "ssh admin@rpi3.local"
Upgrading OS
First, let's ensure the OS is up-to-date in it's current release.
-
To check current version:
$cat /etc/debian_version
12.6

$ lsb_release -a
No LSB modules are available.
Distributor ID:	Debian
Description:	Debian GNU/Linux 12 (bookworm)
Release:	12
Codename:	bookworm

$ uname -r
6.6.31+rpt-rpi-2712 -
To upgrade
sudo apt-get update; sudo apt-get upgrade -y; sudo apt-get full-upgrade -y
Reference: Upgrade Debian OS
Setting up Static IP
Home router uses DHCP to provide dynamic IP to the raspberry Pi when it gets connected to the network. There is probability that once the DHCP lease time expires this IP can get attached to a different device connected to the network. This will create problems as Ceph requires a stable static IP. If you intend to use this setup beyond casual testing, it's essential to assign static IP to the connected servers through the router or modem interface.
The below screenshots are from my home router. The overall steps would be same but the GUI interface settings might be different for other vendors.
-
Login to the router's administration portal. You will find the default IP username/password details in a sticker under the router box.
-
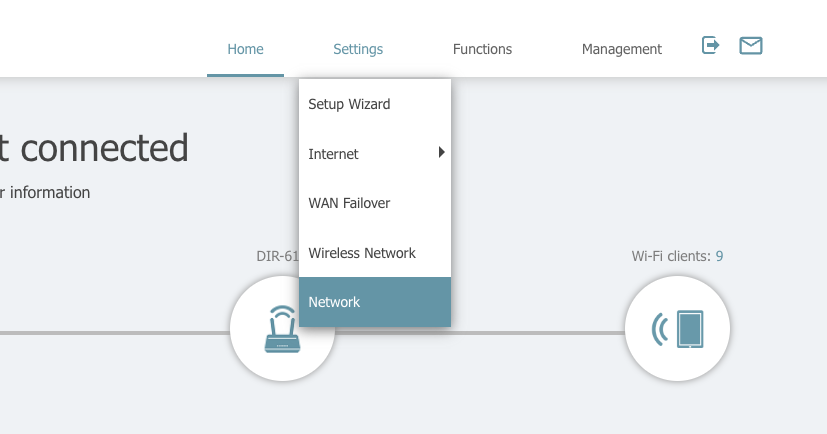
From your router's webserver interface, select the DHCP settings
- Home > Settings > Network
-
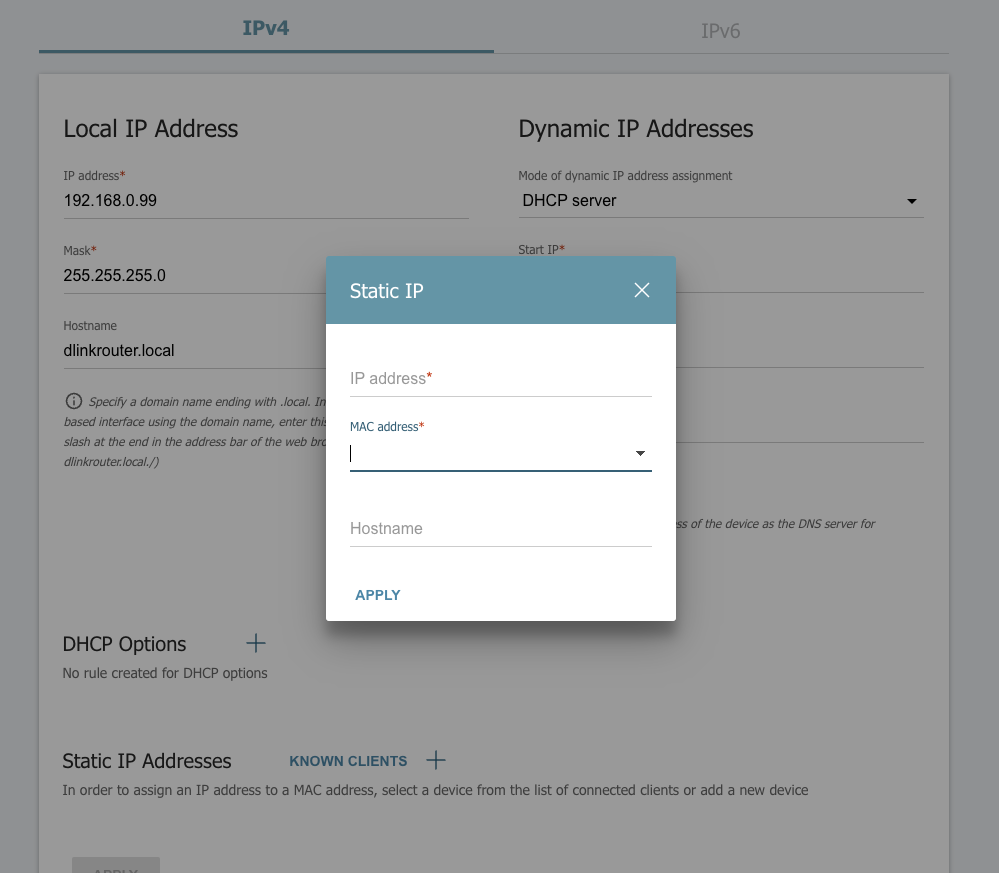
Select the option to set Static IP, choose the MAC address of your Raspberry machine(use dropdown) and set the IP. (Remember to choose an IP outside the DHCP IP range)
-
Reboot the Raspberry pi machine and confirm it has the new IP now.