Installing Ceph Cluster
Cephadm orchestrator module is used for the ceph cluster installation.
ceph-common package for Ceph Reef or Squid is not available for Debian 12.7 ARM64 OS. We can install a lower version(pacific) or stick to cephadm shell to monitor and administer the Ceph cluster
We have automated Ceph Cluster installation in a bash script. You may run the script directly instead of doing the below steps manually: One script to rule them all
Manual Method
Installing Cephadm
-
Install podman, lvm2 and chrony
# apt-get -y install lvm2 podman chrony -
To install Ceph Squid version (19.2.0), download it's associated cephadm binary and make it executable
# cd /sbin/ &&
curl --silent --remote-name --location https://download.ceph.com/rpm-squid/el9/noarch/cephadm
# cd -
# chmod +x /sbin/cephadm
# echo "export PATH=/sbin:/bin:/usr/bin:/usr/sbin:/usr/local/sbin:/usr/local/bin" >> ~/.bashrc
# source ~/.bashrc -
Add repo
# cephadm add-repo --version 19.2.0 -
Pull the latest ceph image from Quay
# podman pull quay.io/ceph/ceph:v19.2.0
Installing ceph-common repo
-
ceph-commonpackage for Ceph Reef or Squid is not available for Debian 12.7 ARM64 OS. We can install a lower version(pacific) or stick to cephadm shell to monitor and administer the Ceph clusteras cephadm is backward compatible for most of the features. (You can safely skip this step)# apt-get install ceph-common=16.2.11+ds-2 python3-ceph-argparse=16.2.11+ds-2 python3-ceph-common=16.2.11+ds-2 python3-cephfs=16.2.11+ds-2 -y
# cephadm install ceph-common
Bootstrapping Ceph Cluster
Single node bootstrap example
-
Use this method only if you are
testing Ceph Cluster on a single node# cephadm --image quay.io/ceph/ceph:v19.2.0 bootstrap --mon-ip <replace_with_node_IP> --single-host-defaults
Normal Installation (Creating Ceph cluster with 2 or more nodes)
All Hosts must have the below Requirements installed. Hosts without all the necessary requirements will fail to be added to the cluster.
# apt-get -y install lvm2 podman chrony
-
Run the Bootstrap command from the first node
# cephadm --image quay.io/ceph/ceph:v19.2.0 bootstrap --mon-ip <replace_with_node_IP> -
Once bootstrap is complete you will see messages in terminal which will include the Dashboard URL and login credentials, for example;
Important : Login to the Dashboard and reset the passwordCeph Dashboard is now available at:
URL: https://rpi3:8443/
User: admin
Password: 9pbxkxkxkx -
Check the Ceph status
# cephadm shell ceph statusnoteFrom here on, please note that the ceph commands are run from inside Cephadm shell. To log into the Cephadm shell:
# cephadm shell -
Add additional host to the cluster
- Enable root ssh access in the second node
# nano /etc/ssh/sshd_config
PermitRootLogin  yes
# systemctl restart ssh - Install the cluster’s public SSH key in the new host’s root user’s authorized_keys file:
# ssh-copy-id -f -i /etc/ceph/ceph.pub root@*<new-host>* - Tell Ceph that the new node is part of the cluster and label it as _admin:
# ceph orch host add *<newhost>* [*<ip>*] --labels _admin
- Enable root ssh access in the second node
-
Add OSDs to the cluster
PrerequisitesAttach one or more additional Raw disks (HDD, SSD or NVMes) to the nodes. It should be wiped clean and should have no partitions or filesystem header:
To zap a disk using ceph orch command: `# ceph orch device zap <hostname> </dev/sdX> --force`
To wipe a disk using wipefs: `# wipefs /dev/sdX -a`
Oftentimes, you would need to do them both.
- List the available devices to deploy OSDs:
(Look for Available : Yes)
# ceph orch device ls --wide --refresh - Add the OSDs
For example:
# ceph orch daemon add osd <hostname>:/<devicename># ceph orch daemon add osd rpi1:/dev/sda
# ceph orch daemon add osd rpi2:/dev/sda - Verify the OSD status
# ceph osd tree
NoteIf there are any errors in the
ceph statusorceph health detailgo to Troubleshooting doc. - List the available devices to deploy OSDs:
(Look for Available : Yes)
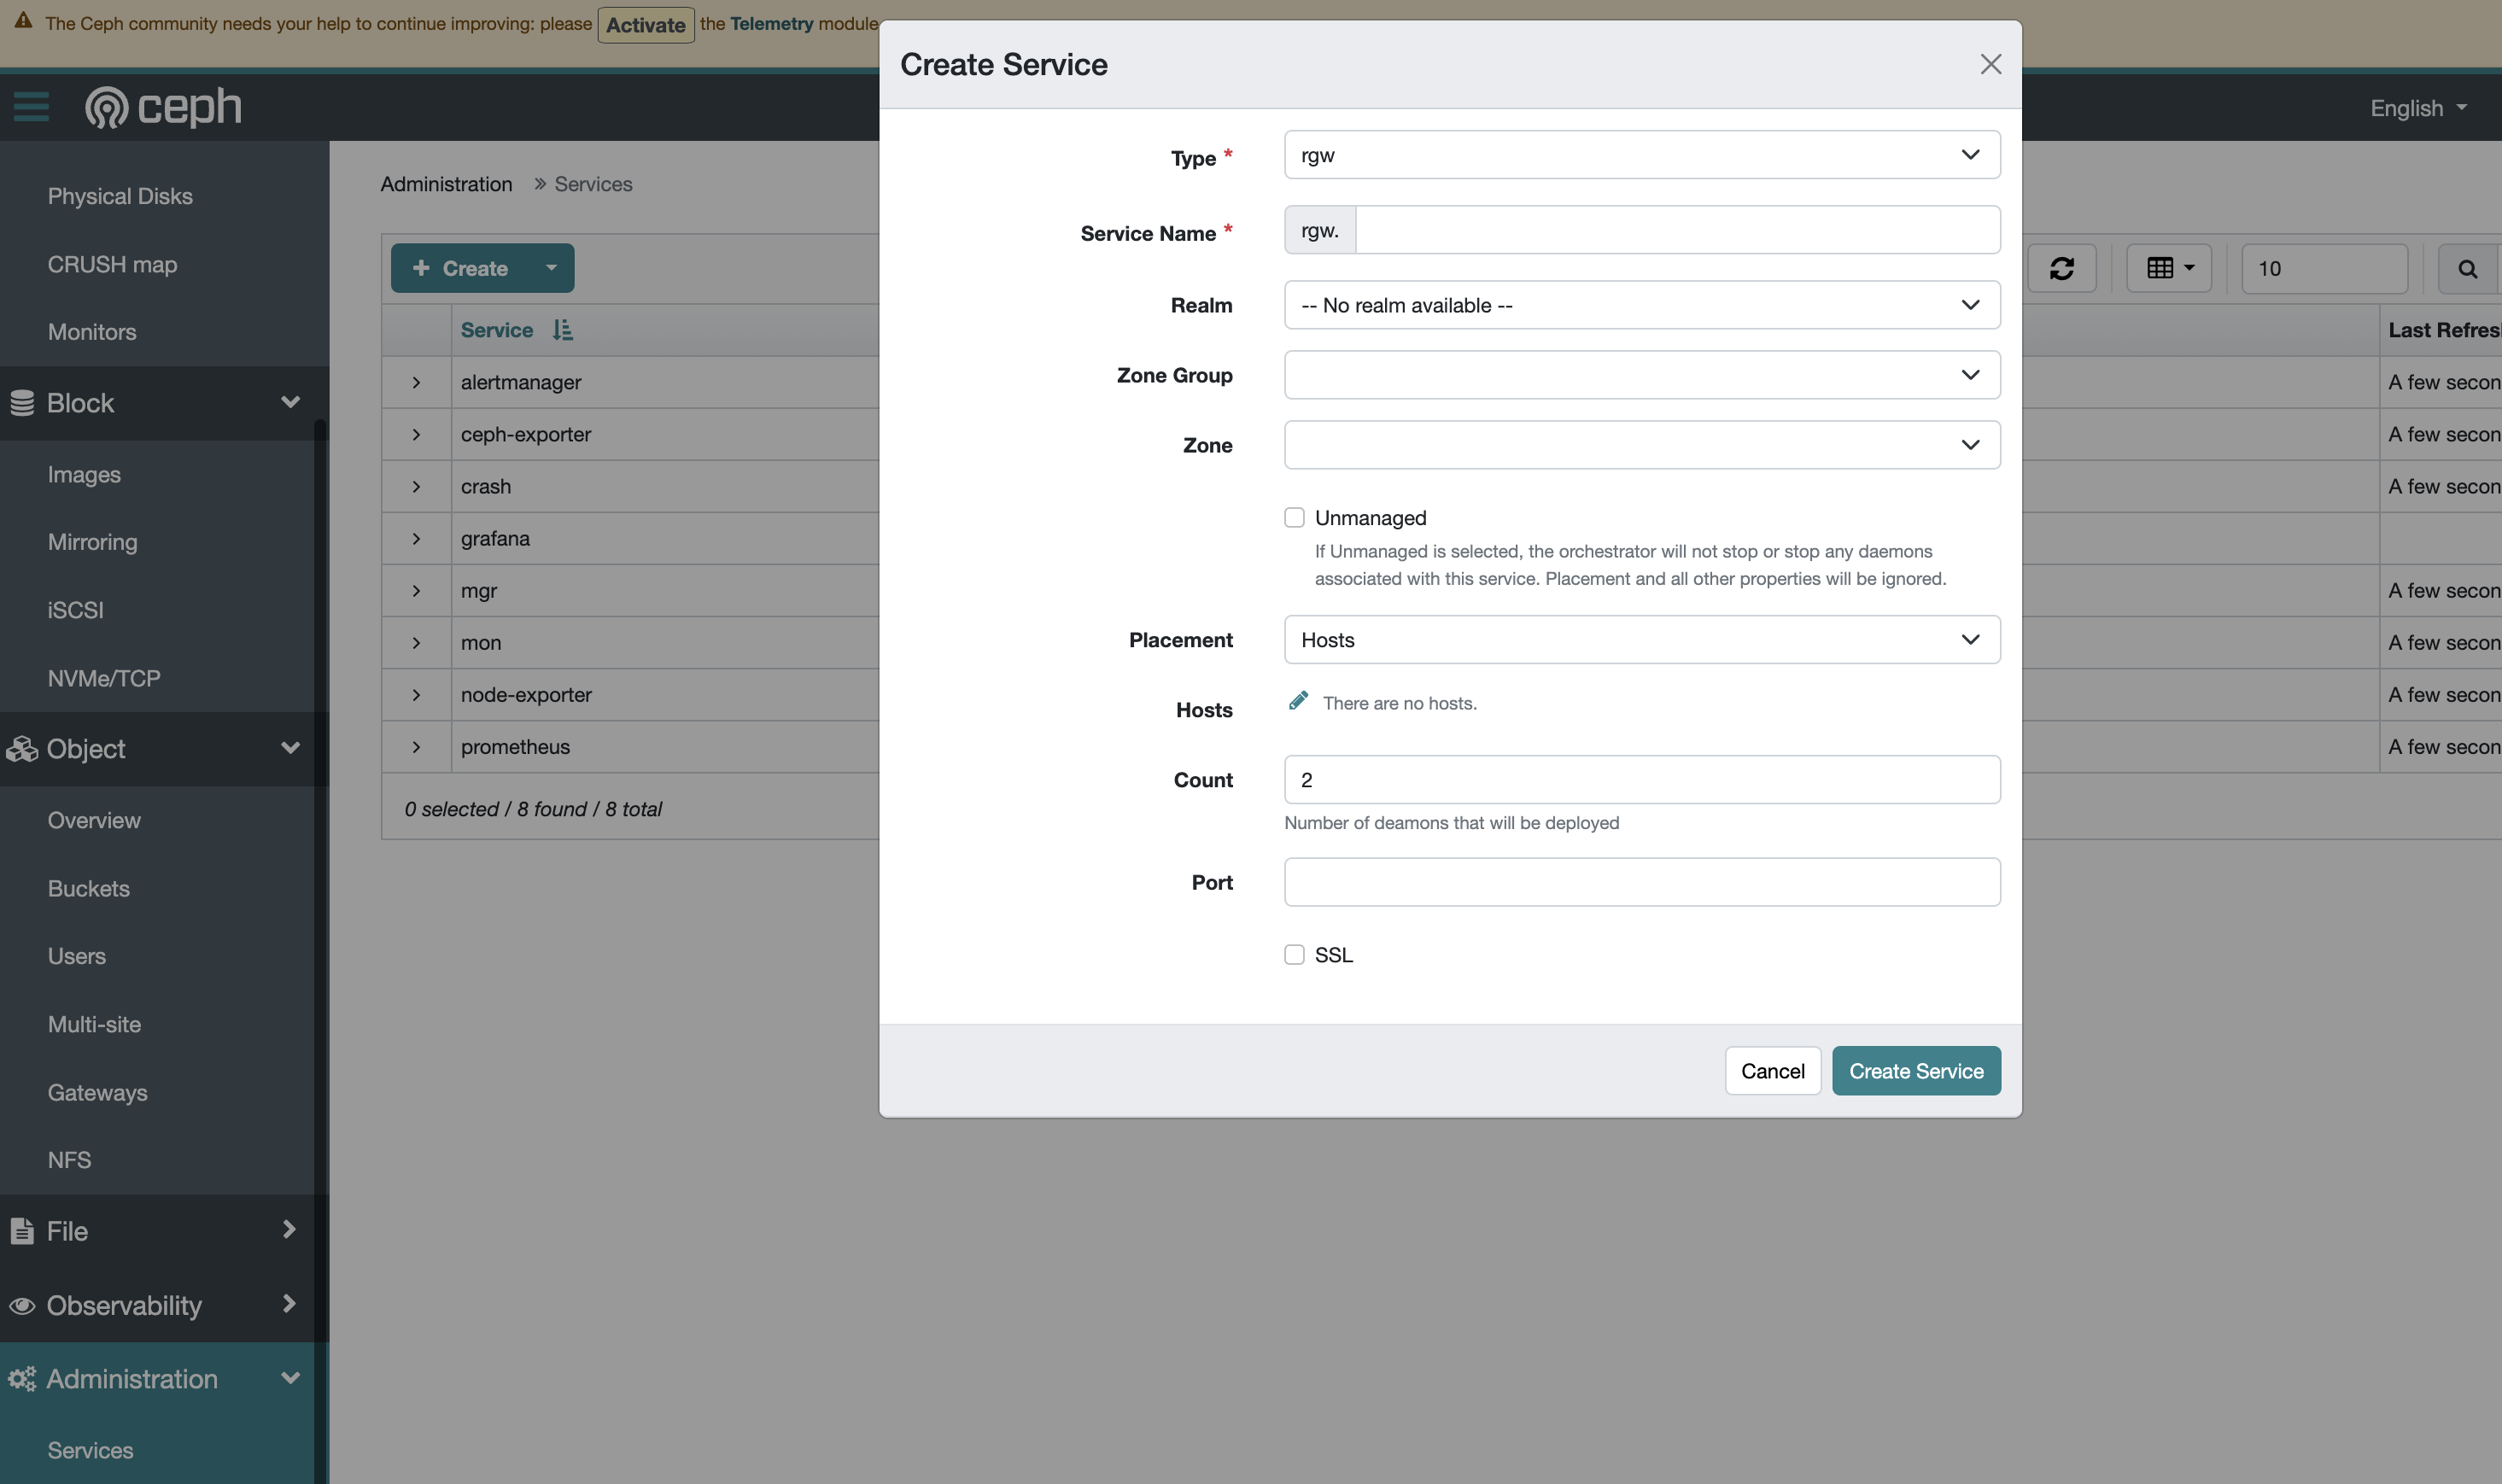
Deploying RADOSGW service for S3
RGW service can be easily added from dashboard :
-
Login to Dashboard
https://<IP>:8443 -
Go to Administration >> Services >> + Create and enter the details
Creating an RGW user and bucket
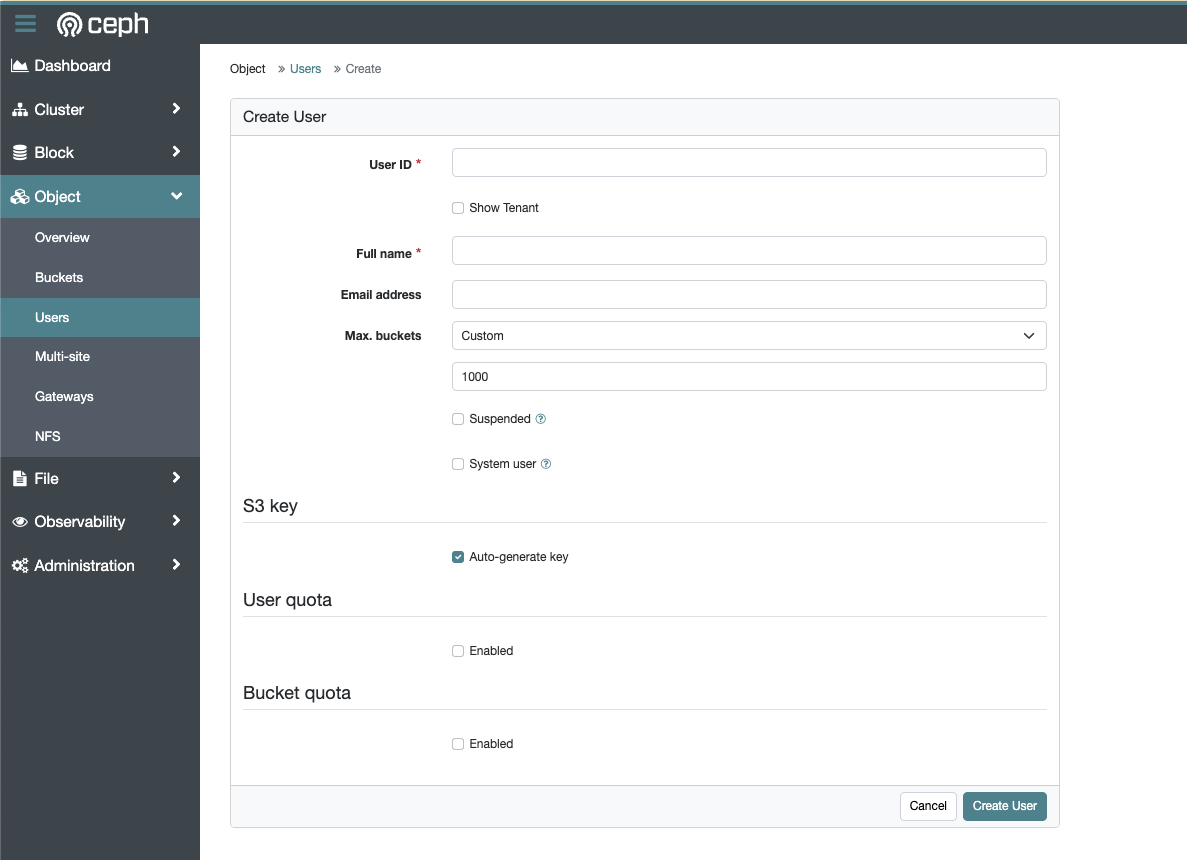
To create user:
-
Login to Dashboard
https://<IP>:8443 -
Go to Object >> Users >> + Create
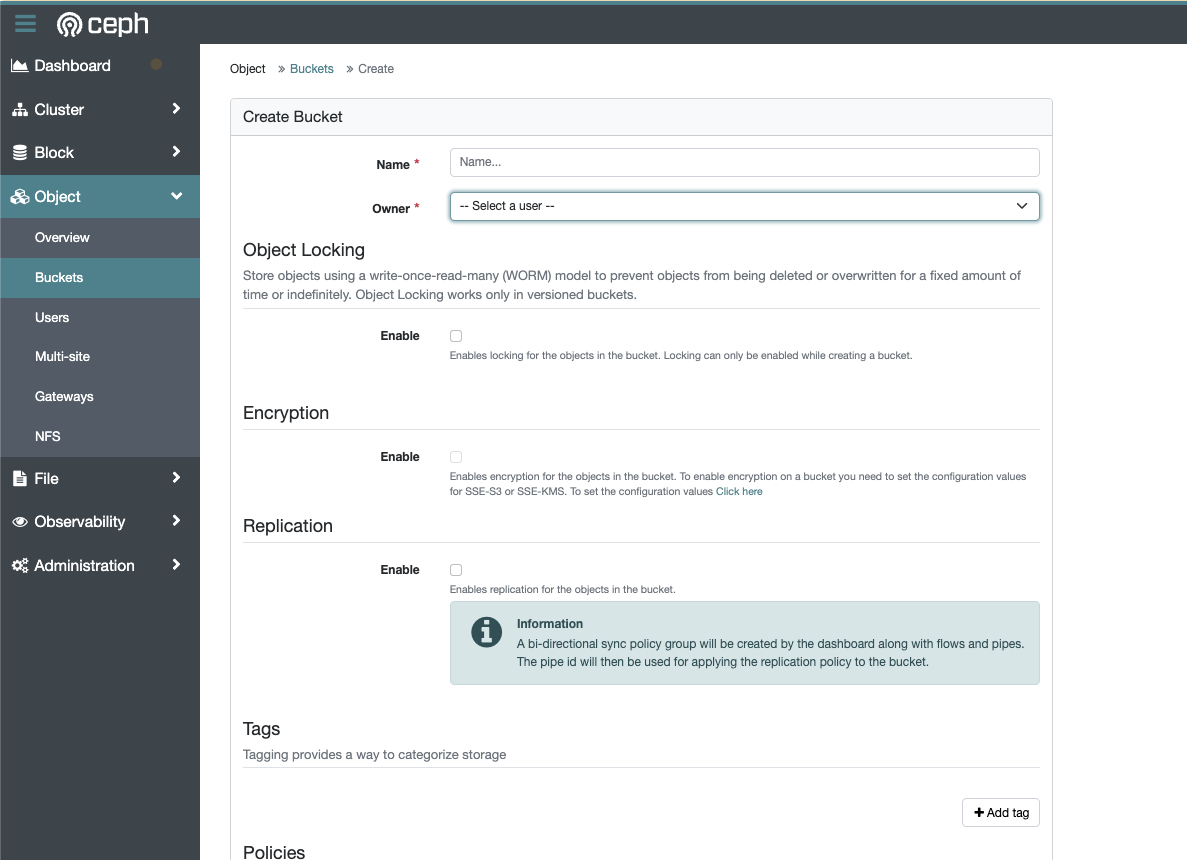
To create bucket:
-
Login to Dashboard
https://<IP>:8443 -
Go to Object >> Buckets >> + Create Bucket